Introduction
This article is designed to help you reduce server costs for ARK: Survival Ascended (hereafter ASA) as much as possible and easily set one up even for beginners.
[Key Points of This Article]
Build a server just by copying and pasting 5 commands!
- step1
Sign Up for Contabo, a VPS Hosting Service
- step2
Connect to Your Newly Created Server
- step3
Install the ASA Server by Copying and Pasting Commands
- step4
Update Server Information, Including Server Name and Password
- step5
Verify You Can Log In and Play on the Server
Estimated Time: 30 minutes to 1 hour
Server name and password changes have also been simplified, allowing even beginners to quickly set up their own server and start playing.
Note: Since the ARK: Survival Ascended Dedicated Server is downloaded through Steam, please review the Steam Subscriber Agreement beforehand.
Please note that it cannot be used for commercial purposes.
Why Build an ASA Server on Contabo?
Because It’s Cheap!!!
For ASA, NITRADO has an exclusive rental server partnership, and even if you only plan to play with a small group of players, the minimum available option starts at 20 slots.
We only wanted to play with three friends… but the cost is way too high…
By using a VPS from Contabo and setting up your own ASA server, you can enjoy playing at a much lower cost.
What is Contabo?
Contabo is a long-established global hosting provider based in Germany.
Its biggest advantage is its outstanding cost performance, offering affordable prices and large storage capacity compared to many other providers.
| Subscription Period | NITRADO | Contabo (Cloud VPS 6) |
| 30days | $32.29 | $9.00 |
| 90days | $87.29 | $27.00 |
| 365days | $322.19 | $115.80 |
※As of July 2026
Note: The price comparison is based on the rates available at the time this article was written. Please check the official websites of each service for the latest pricing information.
Tips
A rented server is considered an unofficial server. This means that whether you host it on your own PC or use a cloud service such as NITRADO or Contabo, it will still be classified as an unofficial server.
Sign Up for Contabo & Set Up Your Server
First, we will create a Contabo account and subscribe to a VPS plan.
Sign Up for Contabo
↓You can sign up using the link

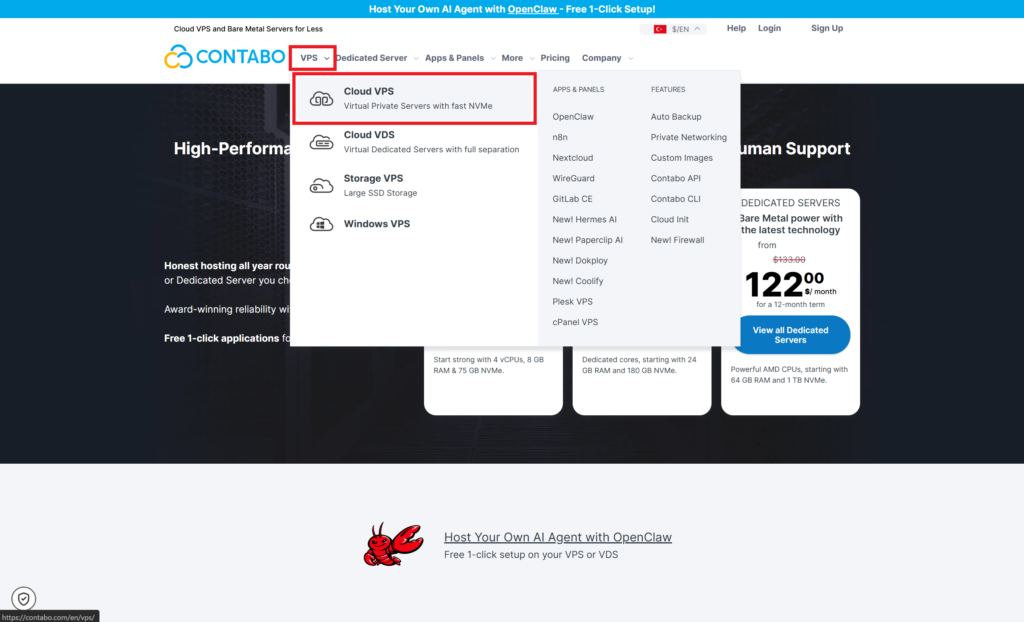
From the Contabo website, select Cloud VPS.
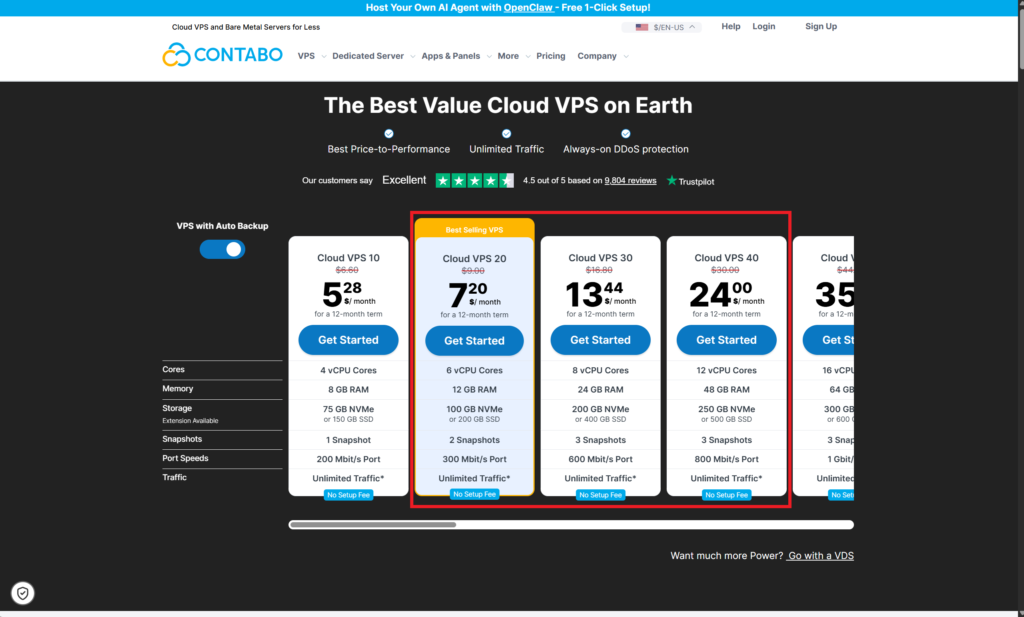
Select Cloud VPS 6 or higher as your server plan.
Choose Cloud VPS 6 or higher as your server plan.
The following are recommended guidelines for choosing a plan. However, when setting up your server for the first time, we recommend starting with a lower-cost plan to make sure everything works properly before upgrading.
Cloud VPS 6: Minimum recommended option for a small group of players (around 5 players)
Cloud VPS 8: Suitable for comfortable gameplay with small to medium-sized groups (around 5–20 players)
Cloud VPS 12: Recommended for large groups (up to around 70 players) and servers running many mods
Select Options
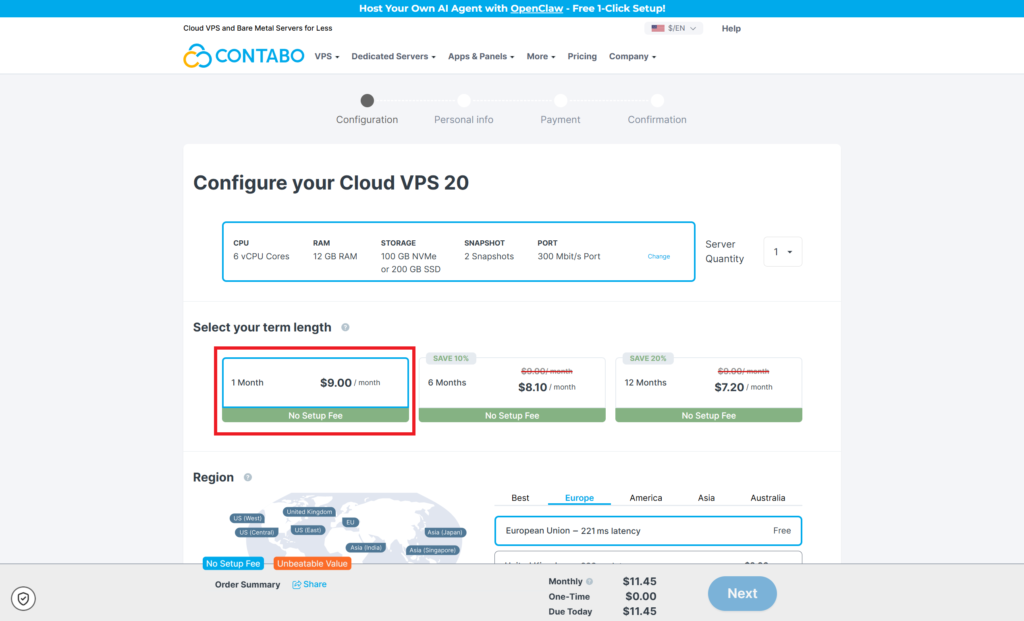
Select the server options according to your requirements.
■Subscription Period
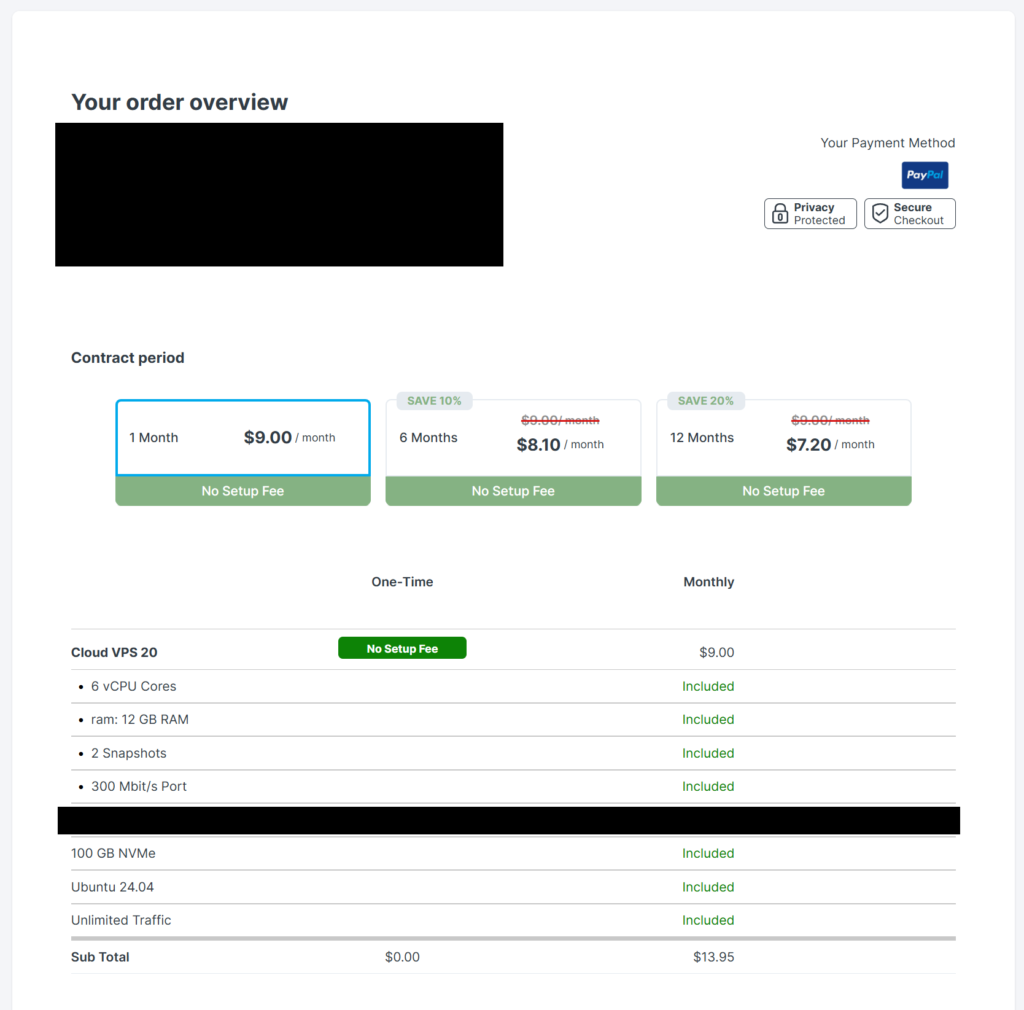
Choose your preferred subscription period.
Longer subscription periods offer discounts.
If this is your first time setting up a VPS, we recommend starting with a 1-month plan to reduce the risk.
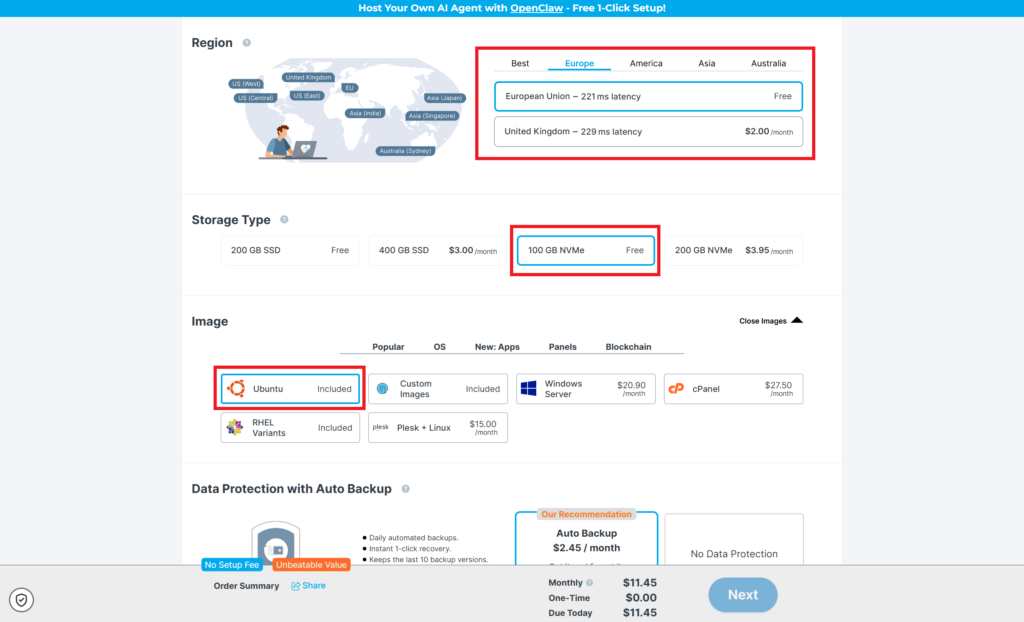
■Region / Storage Type / Image
Region: Select a location that is close to where you will be using the server.
(An additional small fee may be required depending on the selected region.)
Storage Type: 100 GB NVMe.
Image: Ubuntu.
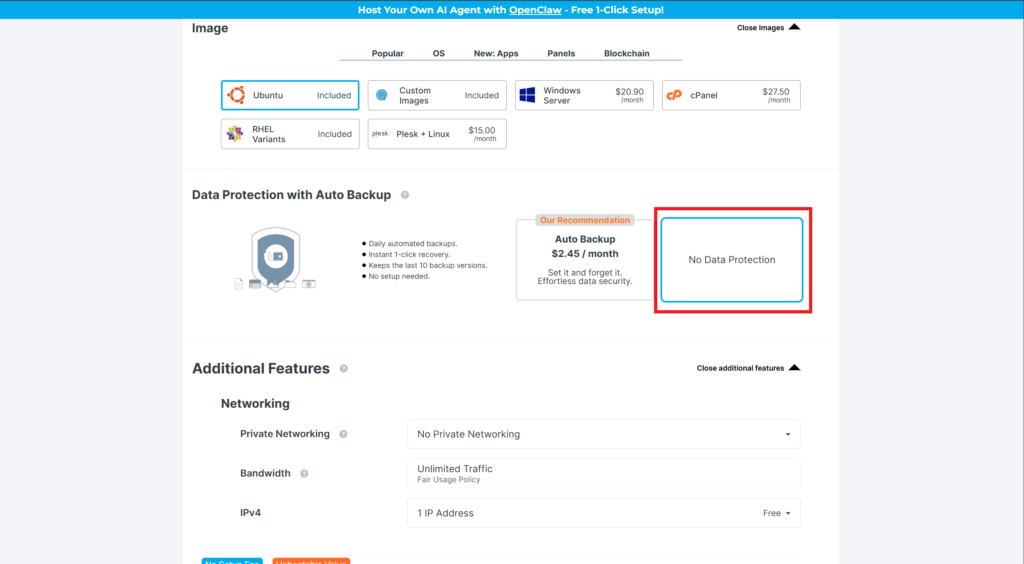
■Data Protection & Auto Backup
Select No Data Protection
To save costs on game data, manage backups yourself.
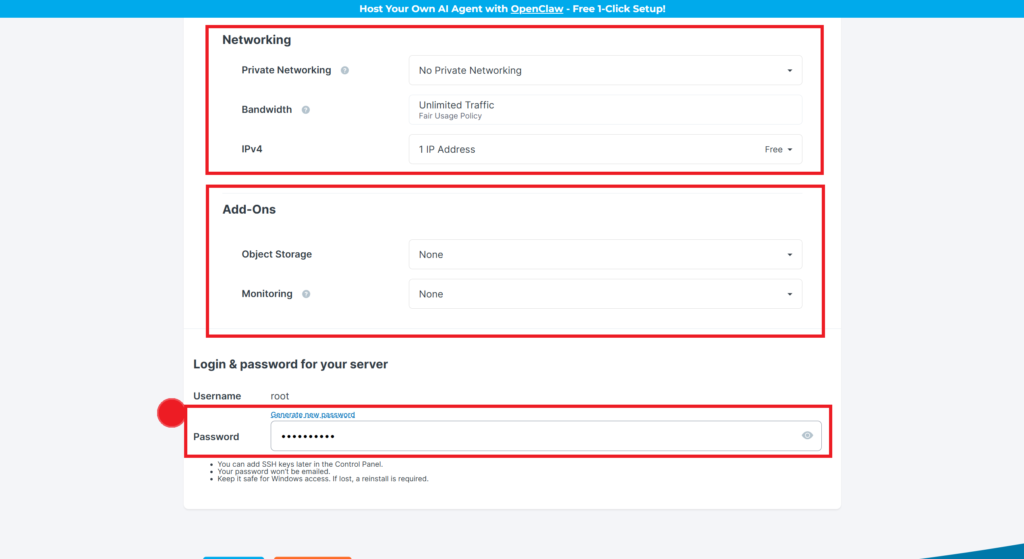
■Networking / Add-Ons / Login & Password
Networking / Add-Ons can be left as default.
Login & Password is crucial.
Be sure to take notes or store it securely so you don’t forget it.
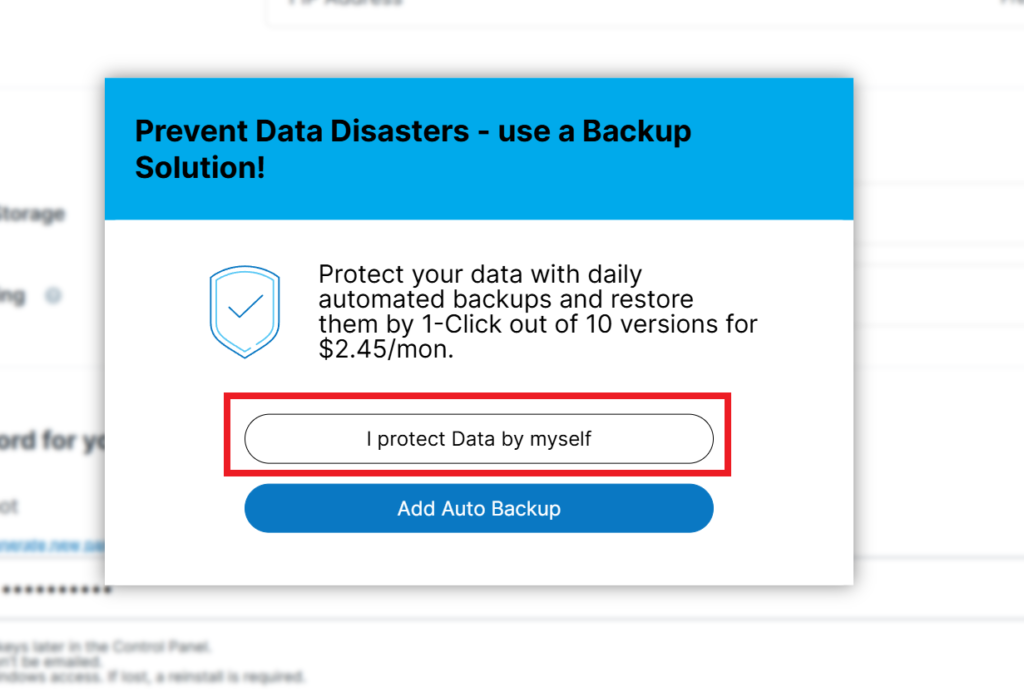
Confirmation of AutoBackup
After finishing the option settings, a confirmation screen for AutoBackup will appear, but you can ignore it and proceed.
Enter Account Information to Register
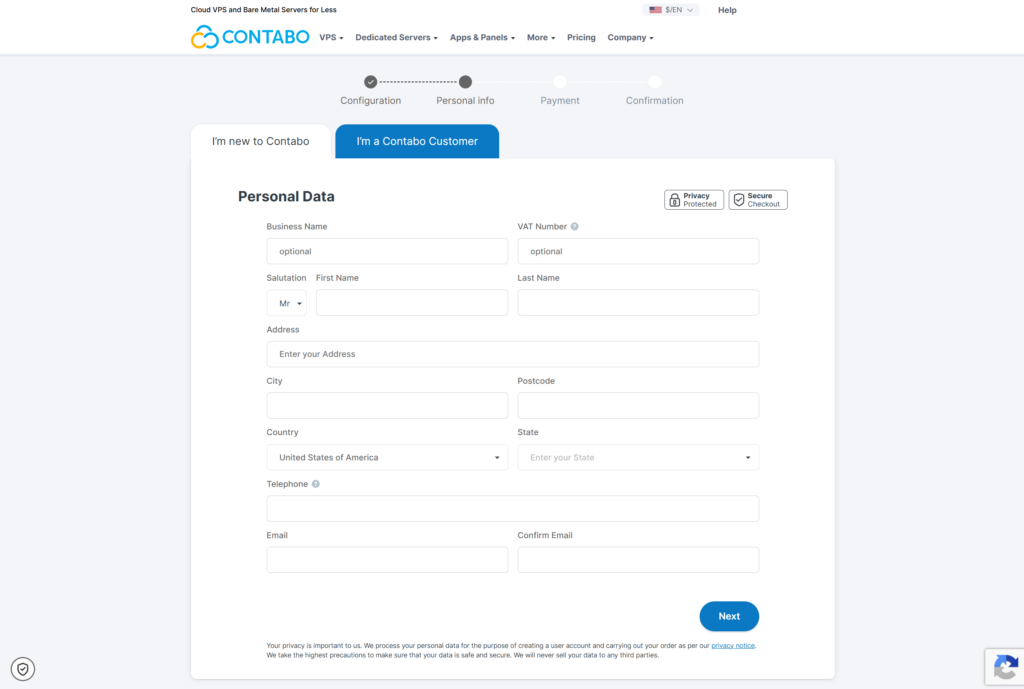
Enter Payment Information
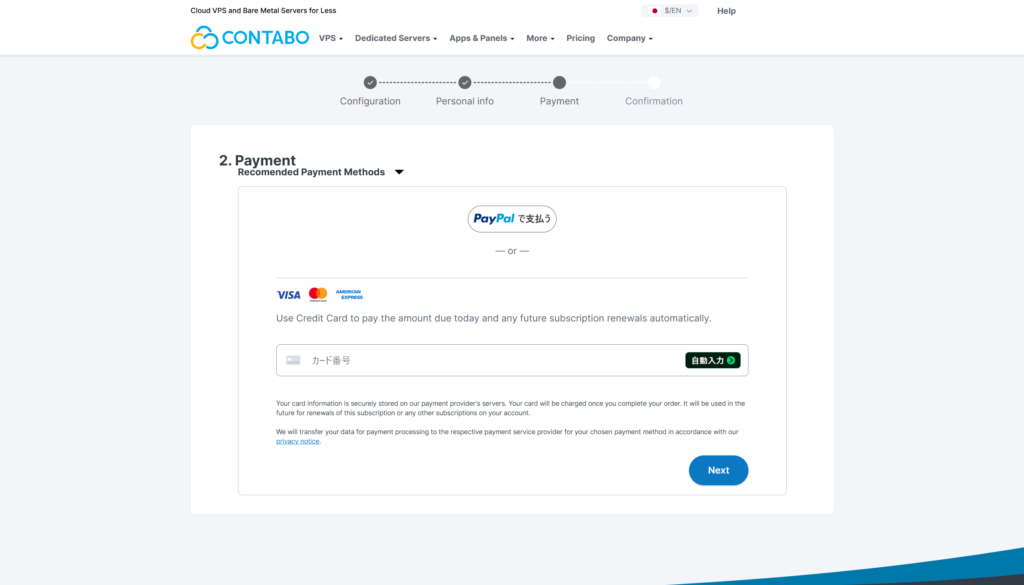
Final Review of Order Details
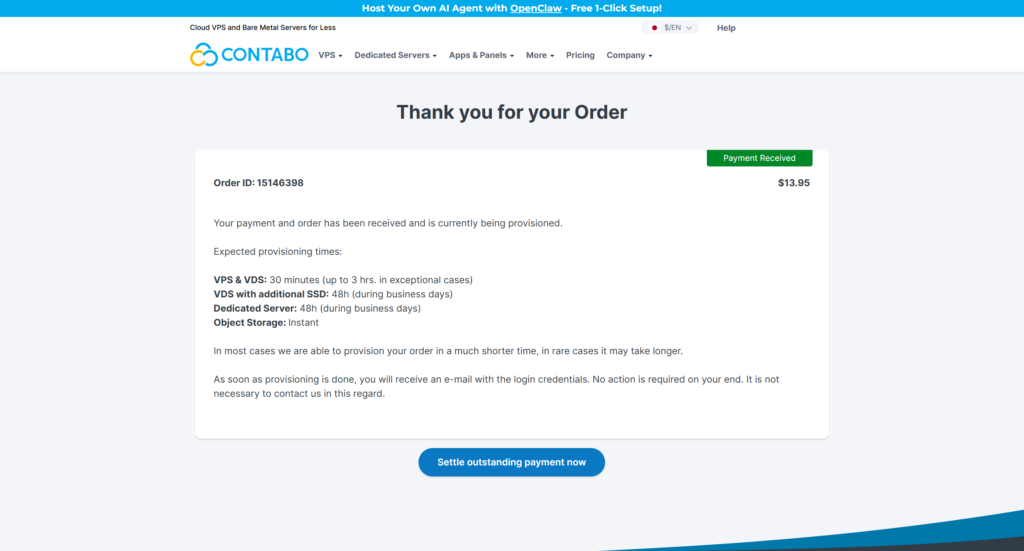
Order Complete Screen
Within a few minutes to a few hours after this screen is displayed, your server will be ready, and you will receive a notification email at your registered email address.
Connect to Your Server
After receiving the email confirming your server setup, check your server in the Contabo Console and proceed to connect to it.
Check Your Server in the Contabo Console
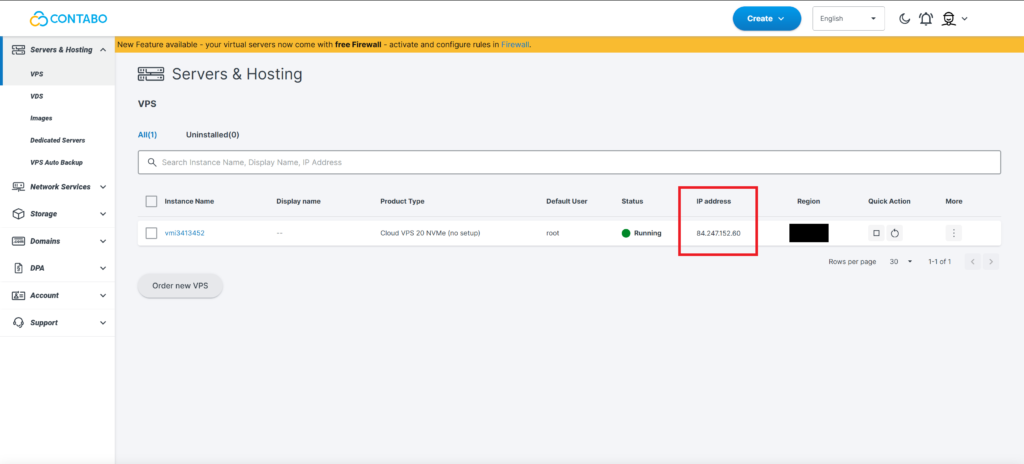
Connect Using an SSH Tool like TeraTerm
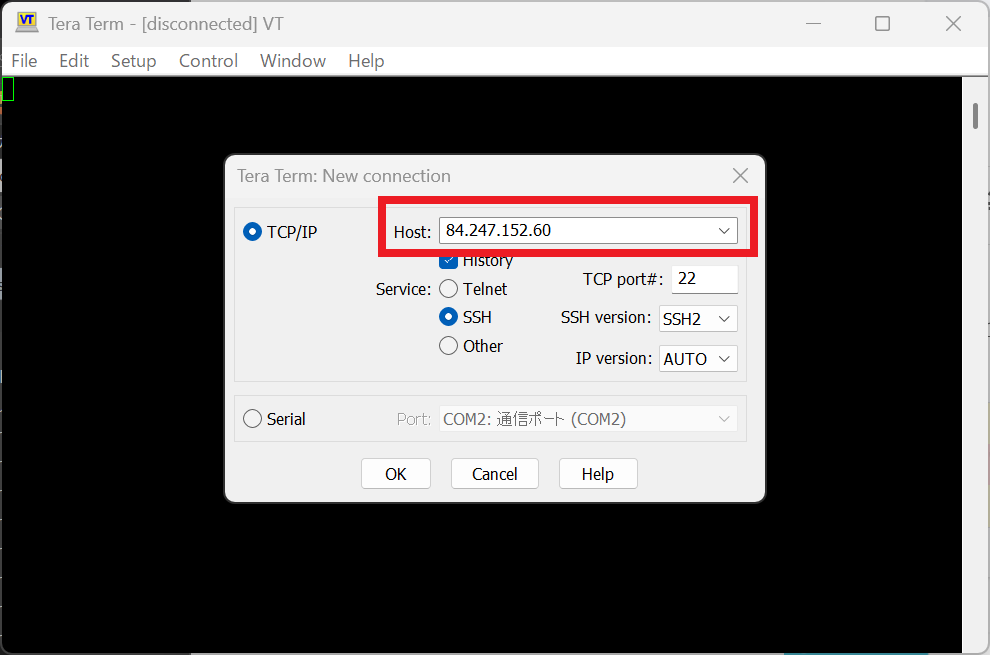
Connect to the server using a server connection tool such as TeraTerm.

① Enter the IP address found in your Contabo Console into the Host field.
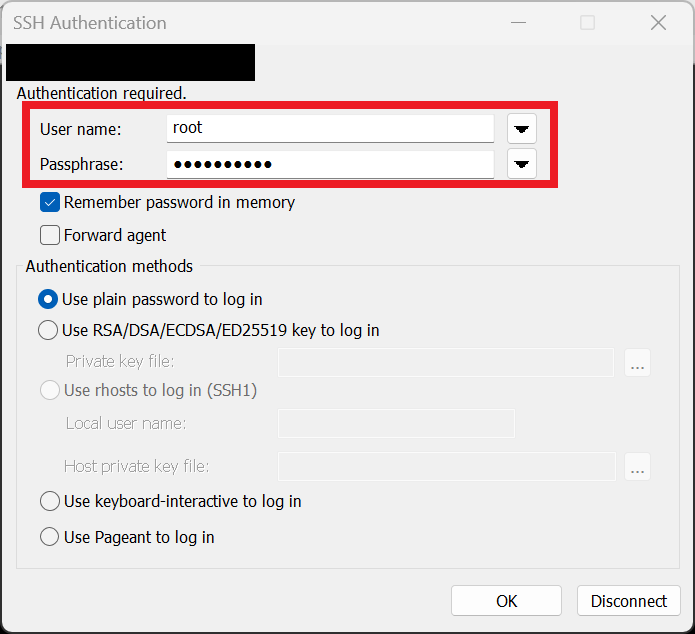
② Enter “root” for User name and your Contabo setup password for Passphrase.
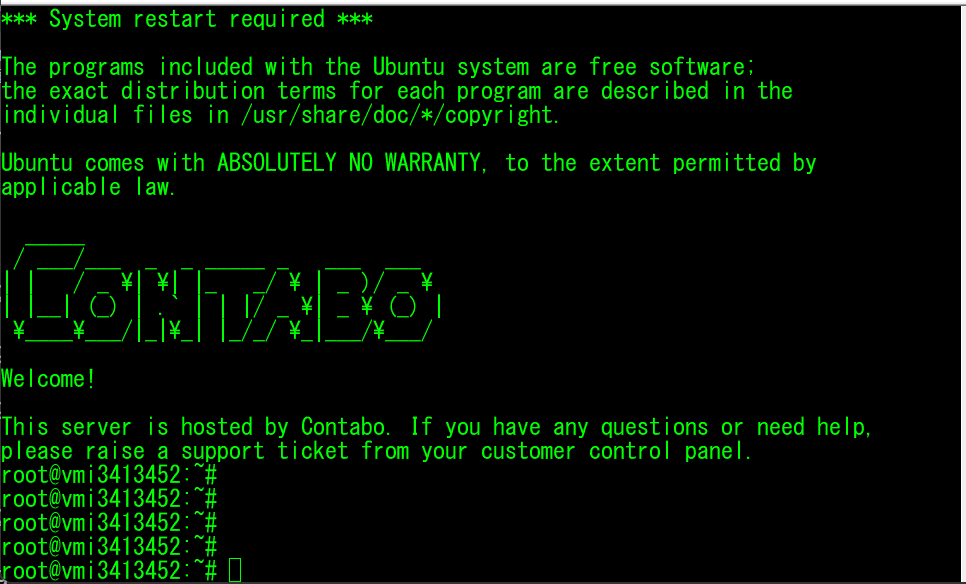
③ Once logged in successfully, a screen like the one below will be displayed.
Installing the ASA Server
Now onto the main topic: installing and configuring the ASA server.
Executing Commands
All you need to do now is enter the commands one by one in order.
Please copy and use each command below.
In the TeraTerm console, you can paste copied text by right-clicking.
Confirm the content in the console and press Enter to execute.
git clone https://github.com/HACOTEN-G/ARKSurvivalAscended-Linux-Contabo.git \
&& cd ARKSurvivalAscended-Linux-Contabo
sudo bash /root/ARKSurvivalAscended-Linux-Contabo/server-install-ubuntu20.shIf the process is stuck in a loop and not progressing, please try restarting the server.
ex
Waiting for cache lock: Could not get lock /var/lib/dpkg/lock-frontend. It is heWaiting for cache lock: Could not get lock /var/lib/dpkg/lock-frontend. It is held by process 1488 (unattended-upgr)After restarting, run sudo bash /root/ARKSurvivalAscended-Linux-Contabo/server-install-ubuntu20.sh again.
Shortly after running “sudo ./server-install-ubuntu20.sh”, purple prompt screens and license agreements will appear. Please review them and press Enter to proceed.
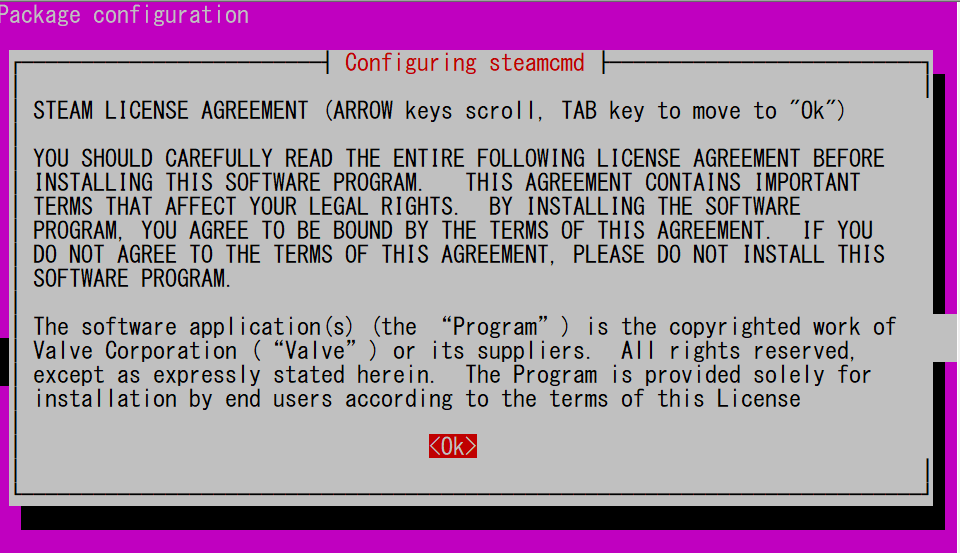
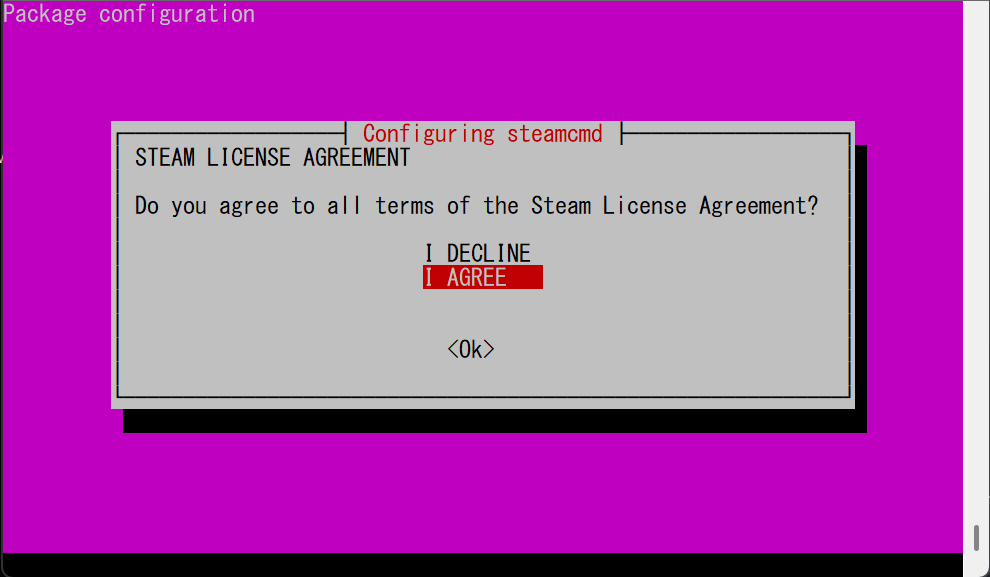
After that, simply wait for the initial server setup to complete!
(Takes about 10–15 minutes)
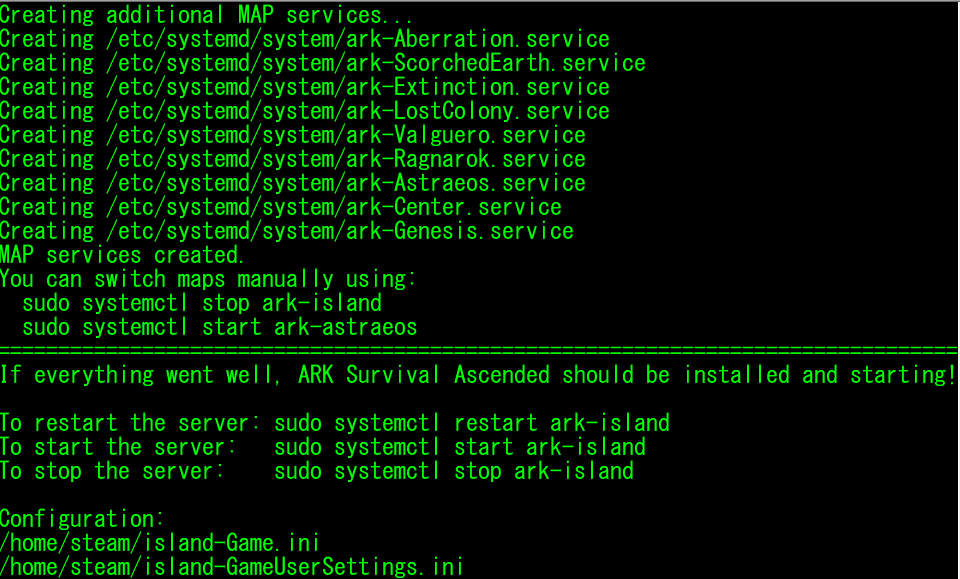
Once complete, a message similar to the one below will be displayed.
If this appears without errors, your server setup is complete!
Click here if you want to know what this script does
Here is a brief summary of what “server-install-ubuntu20.sh” processes:
・Stops and removes ARK: Survival Evolved
・Increases virtual memory using a swap file
・Creates working directories
・Installs required Ubuntu packages
・Creates a dedicated “steam” user
・Installs Proton (used to run Windows software on Linux)
・Installs the ASA server
・Creates systemd startup services
・Relocates xaudio files (to prevent server startup errors)
・Places configuration files like Game.ini
・Creates startup services for maps released up to July 2026
Modifying Server Settings
At this stage, anyone can connect to your server, so let’s set up a custom server name and password.
Running the Map Service Configuration Script
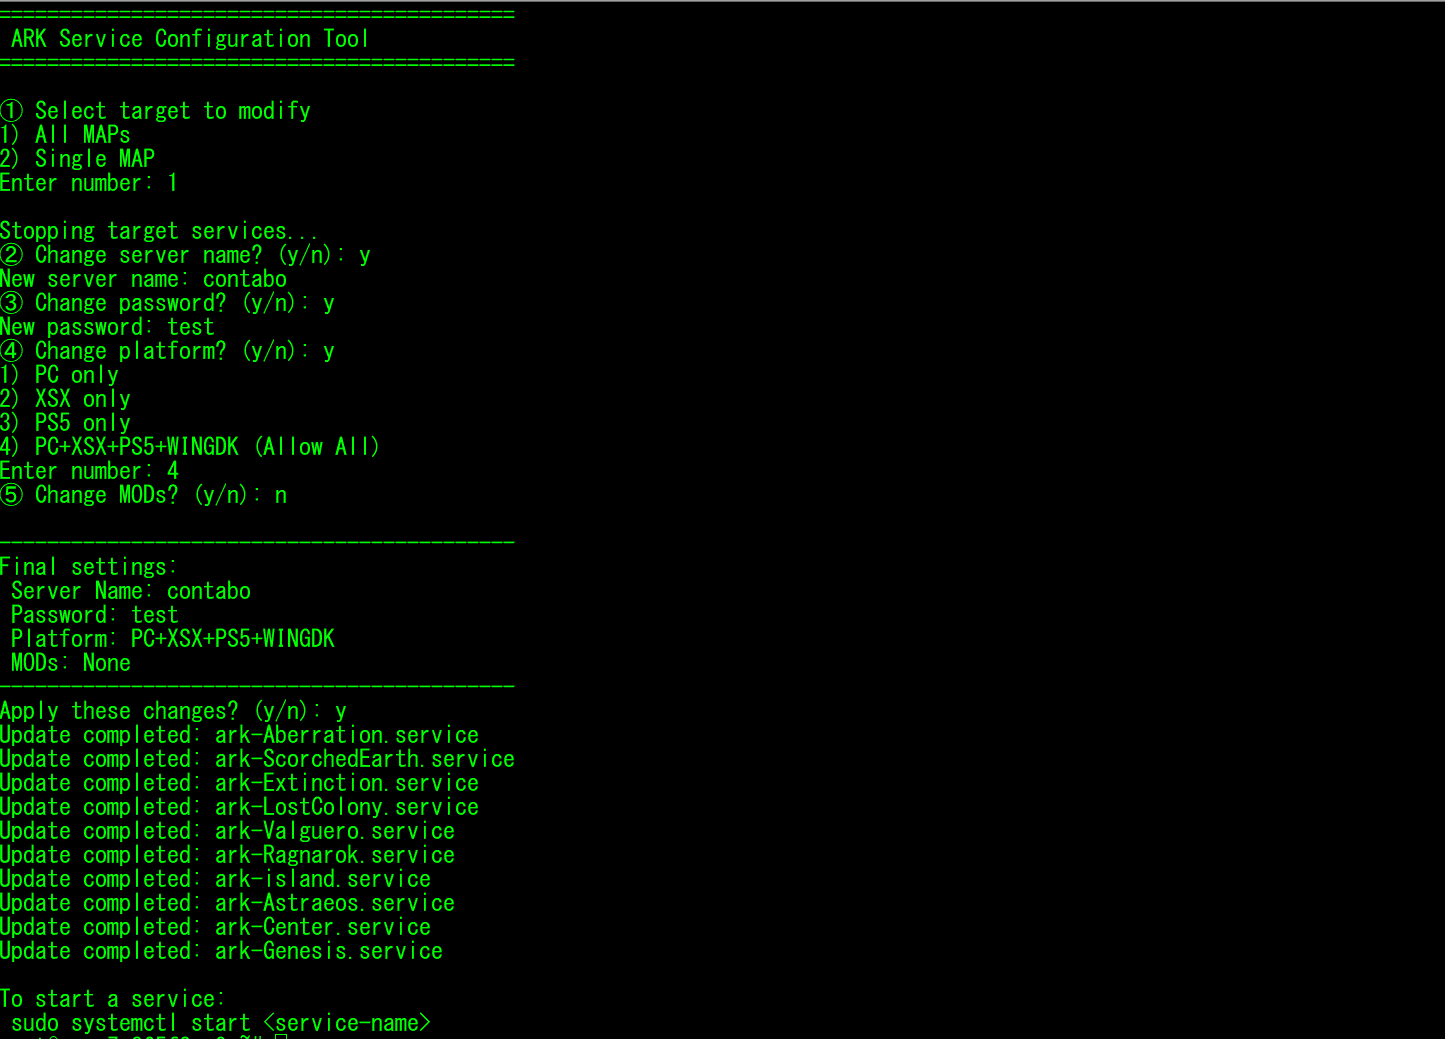
bash /root/ARKSurvivalAscended-Linux-Contabo/update-ark-services.sh① First, you will be asked which map you want to modify.
Enter “1” to select and update all maps at once.
② You will be prompted to change the server name.
Press “y” and enter your desired server name.
③ You will be prompted to change the server password.
Press “y” and enter your desired password.
④ You will be asked about cross-platform settings.
The default is set to PC-only. If you want to play on consoles like PS5, press “y” and select option “4”.
⑤ You will be asked if you want to add mods.
For the first startup, enter “n” to verify that the server runs properly without mods first.
Finally, a summary of your configuration will be displayed. Press “y” to confirm.
(If you see anything you’d like to fix, enter “n” to configure them again.)
Verifying Server Startup
Let’s test if you can connect and play on your server right away!
Start The Island via Command
Run the following command to start The Island map:
sudo systemctl start ark-islandCheck Startup Status
Run the following command to view real-time server logs:
tail -F /home/steam/island-ShooterGame.logAfter a short while, the log will begin updating. If you see a message like the one below at the end of the log, the server has started successfully.
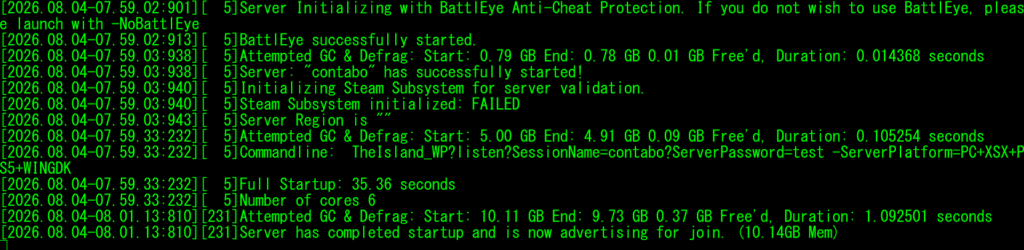
※Press Ctrl+C to stop viewing logs and return to the terminal prompt.
Launch ARK and Log In to Your Server
① Select “Join Game” from the main menu.
② Under the “Unofficial” server tab, enter your server name in the search box at the top right and click “Refresh” to see if your server appears.
Make sure to check the following settings in the search filters:
・Check “Show Password Protected Servers”
・Check “Show Player Servers”
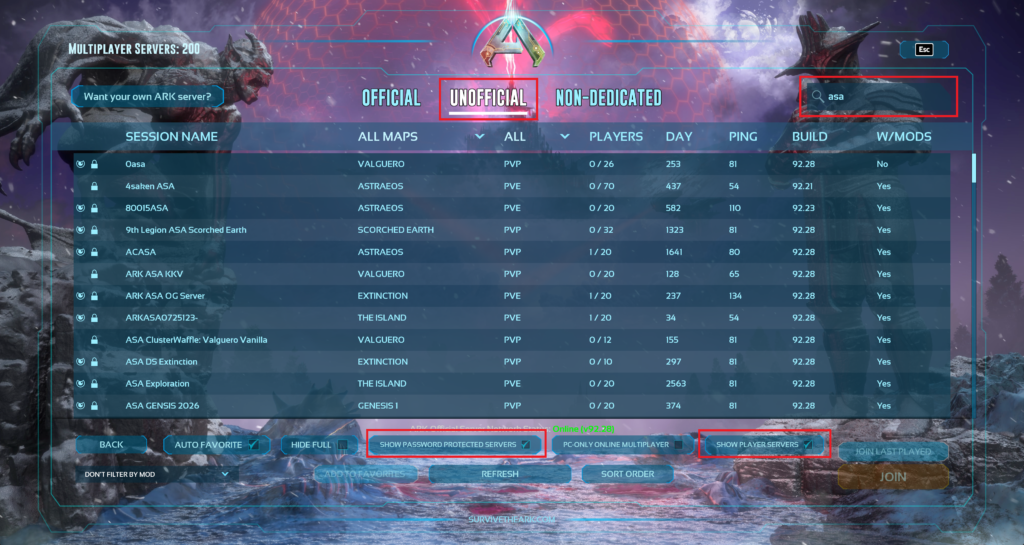
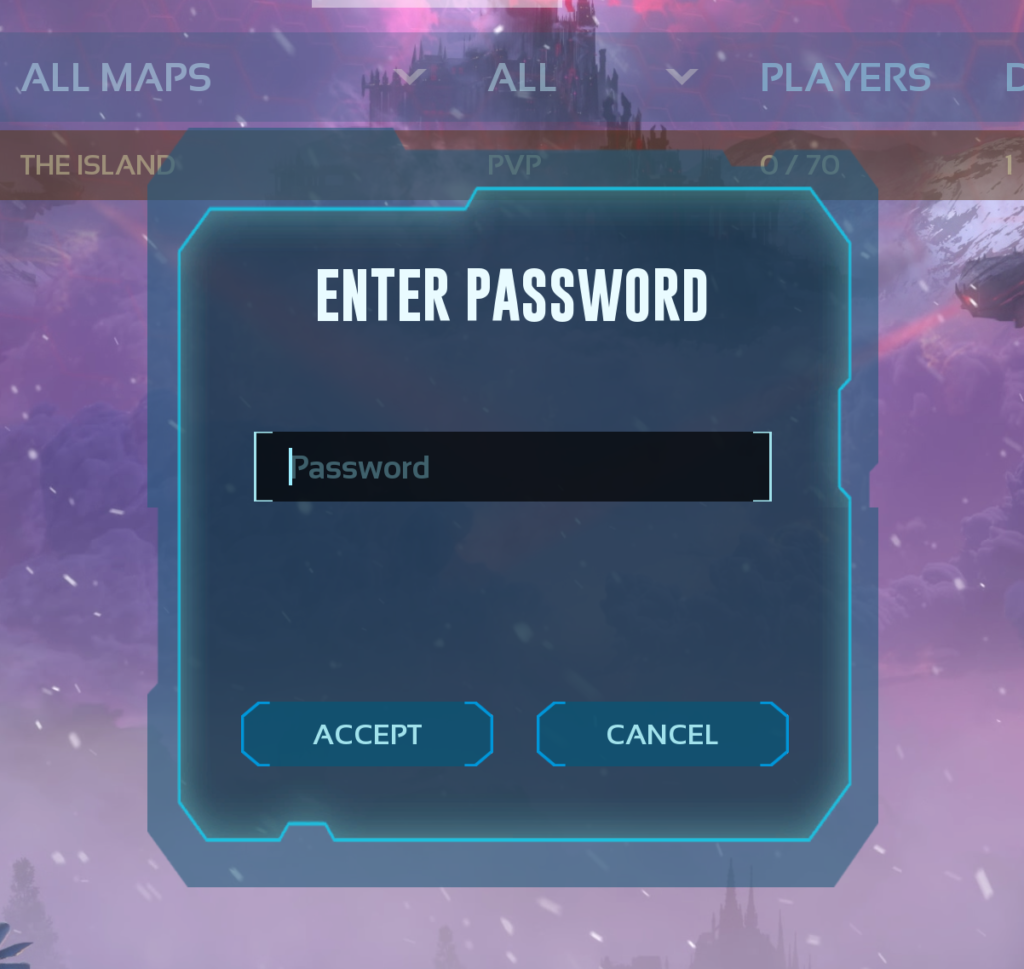
③ Select your server and click “Join”. You will be prompted for a password.
Enter your password and click “Accept”.
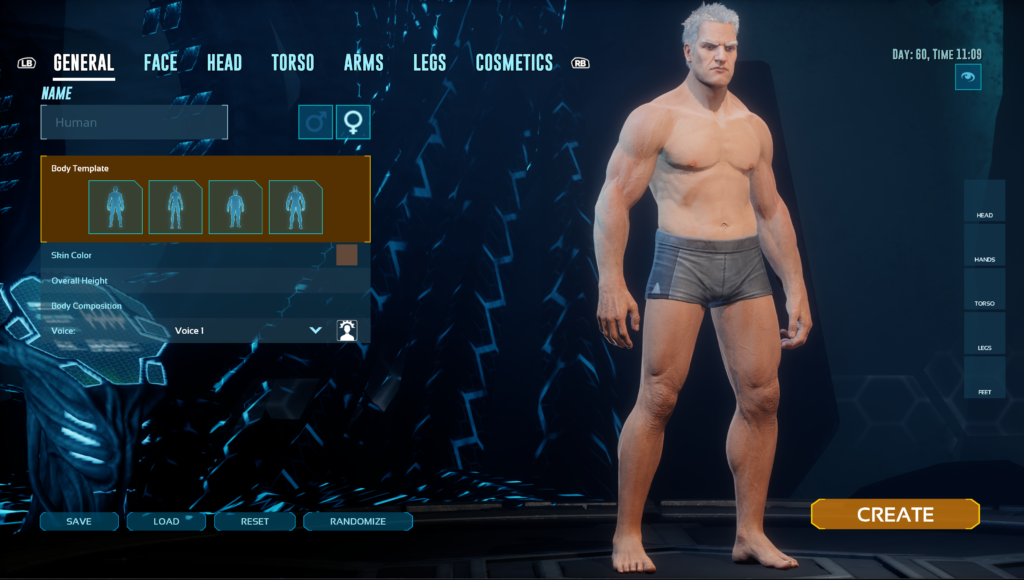
④ If you reach the Character Creation screen, your server setup is a complete success!
You can jump right into survival mode or switch to another map whenever you’re ready.
Useful Command List
Here is a list of handy commands for managing your server.
■ Check ASA Server Startup Logs
tail -F /home/steam/island-ShooterGame.log■ Update ASA Server
sudo -u steam /usr/games/steamcmd +login anonymous +app_update 2430930 validate +quit■ Start ASA Server (The Island)
sudo systemctl start ark-island■ Restart ASA Server
sudo systemctl restart ark-island■ Stop ASA Server (The Island)
sudo systemctl stop ark-island■ Commands to Set Auto-Start on System Boot for Specific Maps
Example: Set Scorched Earth to start automatically on boot instead of The Island.
Run these three commands in order.
systemctl disable ark-island.servicesystemctl enable ark-Scorched.servicesudo systemctl daemon-reloadList of Start/Stop Commands for Each MAP (Click to expand)
・The Island
sudo systemctl start ark-island.servicesudo systemctl stop ark-island.service・Scorched Earth
sudo systemctl start ark-ScorchedEarth.servicesudo systemctl stop ark-ScorchedEarth.service・The Center
sudo systemctl start ark-Center.servicesudo systemctl stop ark-Center.service・Aberration
sudo systemctl start ark-Aberration.servicesudo systemctl stop ark-Aberration.service・Extinction
sudo systemctl start ark-Extinction.servicesudo systemctl stop ark-Extinction.service・Astraeos
sudo systemctl start ark-Astraeos.servicesudo systemctl stop ark-Astraeos.service・Ragnarok
sudo systemctl start ark-Ragnarok.servicesudo systemctl stop ark-Ragnarok.service・Valguero
sudo systemctl start ark-Valguero.servicesudo systemctl stop ark-Valguero.service・Lost Colony
sudo systemctl start ark-LostColony.servicesudo systemctl stop ark-LostColony.serviceDisclaimer
We assume no responsibility or liability for any information, services, or products provided on external sites linked from this article.
Furthermore, while we strive to provide information that is as accurate as possible, we do not guarantee the completeness, accuracy, or safety of the content. Information may become outdated over time.
Please note that we cannot be held liable for any damages or losses arising from the use of content published in this article.
Conclusion
Great job setting up the server!
Have a great survival life!

Comment